
Measure your car.
Understand its geometry.
A useful geometry result starts with your chassis, your mounting points, and a repeatable measurement method.
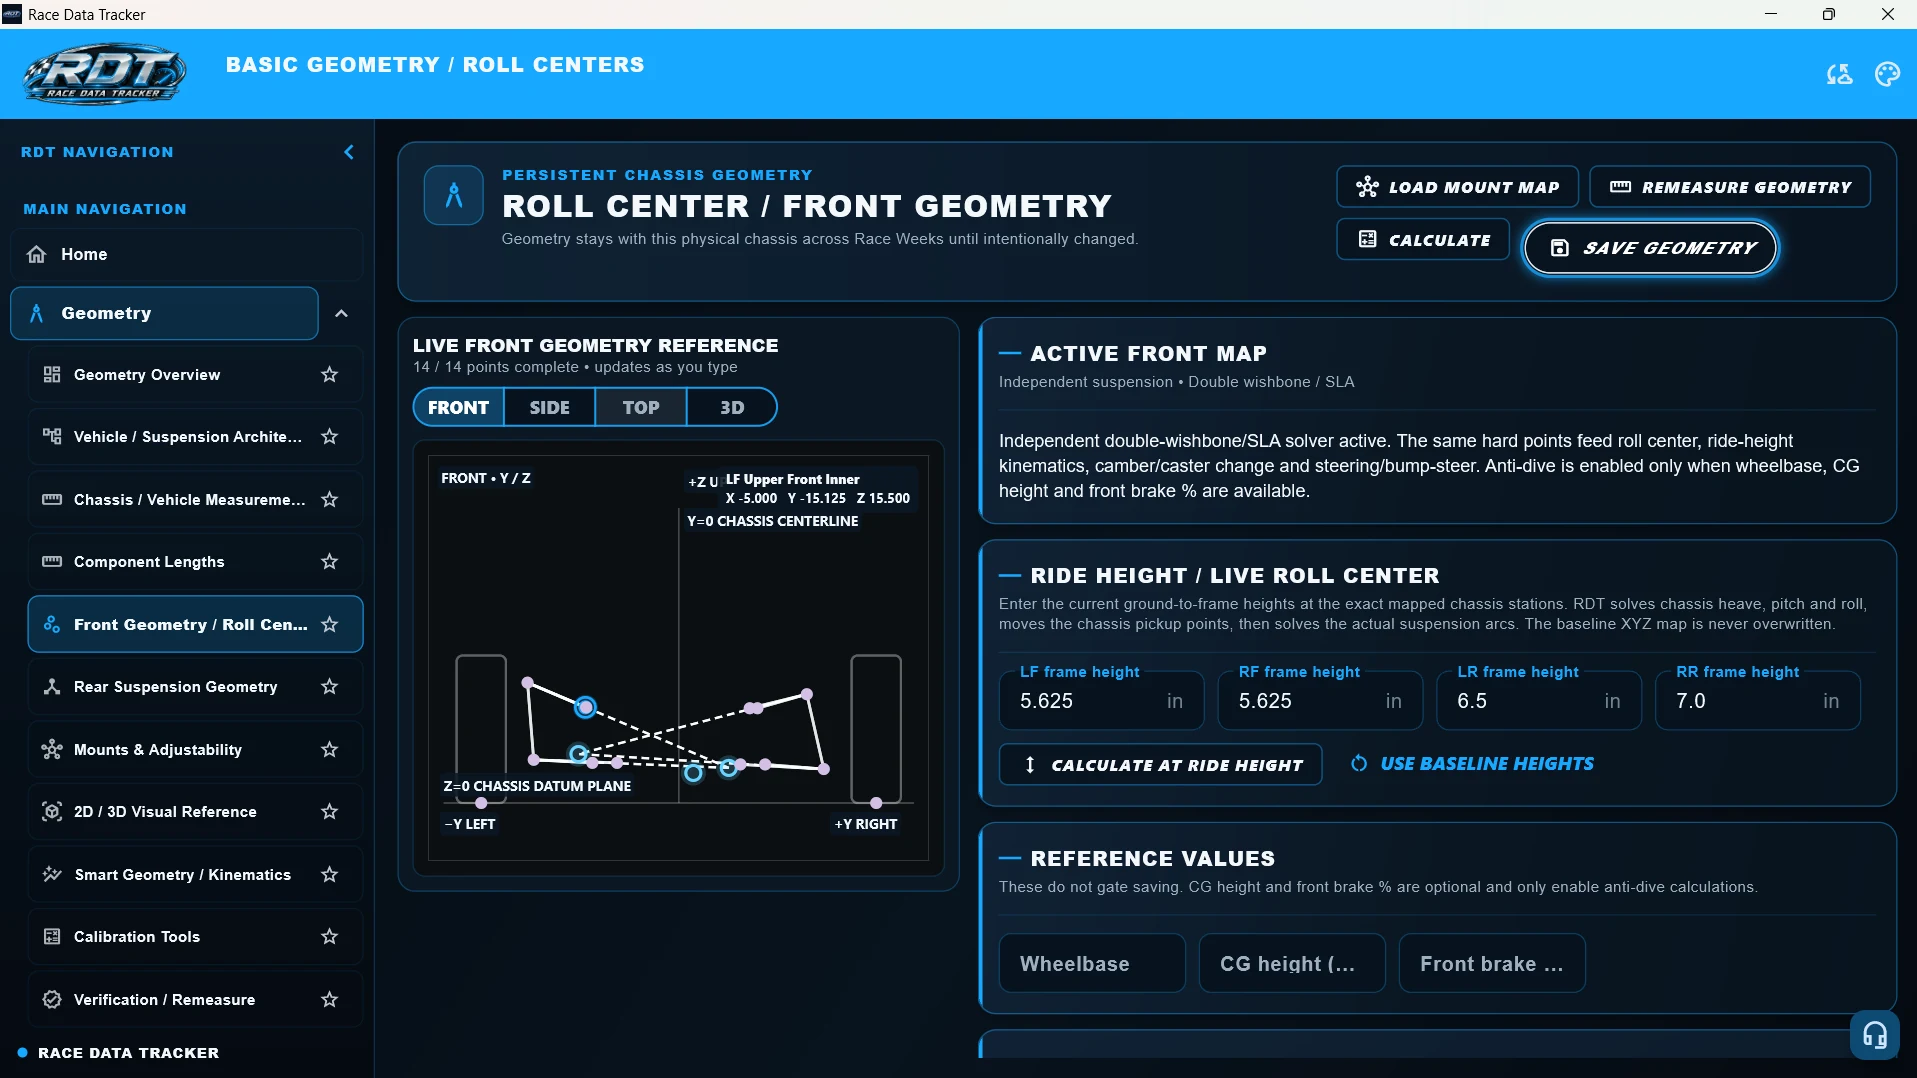
Windows front-geometry reference screen · September 2026. Calculations depend on the selected suspension model and required inputs.
Give every measurement a home.
How you use it
Record the chassis reference points and suspension mounting locations in a consistent coordinate system. The map stays with that physical chassis across race weeks.
Why it helps
You get a measured foundation for calculations and a repeatable reference for future inspections. The map describes the coordinates you entered; it does not measure the car automatically.
Use the model that matches the car.
How you use it
Identify the suspension layout before entering the points used by its geometry model. The front reference screen shows an independent double-wishbone / SLA model.
Why it helps
You get a calculation context tied to the selected architecture. A different suspension layout needs the appropriate model and measurements; the same list of calculations should not be assumed for every car.
Record the configuration you are actually running.
How you use it
Keep chassis-side mounting locations with the car and update the selected mount state when a physical adjustment is made.
Why it helps
The relevant geometry can be reviewed from the current mount positions. A change in the app records or models the position; it does not confirm that the physical mount has been changed.
See where the entered geometry places the roll center.
How you use it
Enter the required front suspension hard points, save the geometry, and calculate using the selected model.
Why it helps
You get a front-geometry reference and calculated roll-center result. That gives you a way to compare configurations rather than judging the mount position by appearance alone.
Evaluate the geometry at the measured stance.
How you use it
Enter LF, RF, LR, and RR frame heights at the mapped chassis stations. The front-geometry screen can calculate at those heights or use baseline heights.
Why it helps
The calculation solves chassis heave, pitch, and roll and the suspension arcs from the entered heights. The baseline XYZ map remains the reference rather than being overwritten by the ride-height calculation.
Look beyond the static alignment number.
How you use it
The double-wishbone / SLA front model uses the same hard-point geometry for ride-height kinematics, camber and caster change, and steering / bump-steer calculations.
Why it helps
You can review modeled suspension and steering behavior from those measured points. Accurate inputs matter: a result based on an incorrect point location describes the wrong geometry.
Supply the additional values the calculation needs.
How you use it
The front screen includes wheelbase, center-of-gravity height, and front brake percentage as reference inputs. Anti-dive is enabled when these values are available.
Why it helps
You get the additional calculation only when its required references are supplied. Do not enter guessed values solely to make a result appear.
Check the points from more than one view.
How you use it
Use the front, side, top, and 3D views to inspect the mapped geometry and selected points. Coordinate labels identify the chassis centerline, datum plane, and directions.
Why it helps
A visual reference helps catch wrong-side entries, swapped axes, or unexpected point locations before using the calculation.
Compare the car with its saved reference.
How you use it
Measure the same defined points again during an inspection and compare them with the established chassis baseline.
Why it helps
Differences help identify locations that need rechecking. A discrepancy is a reason to investigate measurement technique or possible movement; it does not establish damage by itself.
Start with a repeatable baseline.
Use the same physical references, units, and coordinate directions every time. Check the mapped points before treating a calculated result as a setup reference.
Read the Geometry guideTools and calculations vary by architecture, plan, platform, and release.